
RadQA
Catch laterality conflicts, uncommunicated critical findings, protocol deviations, and image-quality defects before they leave the department — with evidence marked on the report and a human approving every write-back.
RadQA is a quality-assurance assistant for imaging departments. It is not a diagnostic device and does not replace radiologist reporting or clinical judgement. Validate against your own systems and local governance before production use.
Radiology
RadQA
Who it’s for
Radiology and imaging departments, QA leads, radiographers, and radiologists who want systematic quality assurance without adding manual review load.
Problem
Radiology QA is mostly retrospective sampling done by hand. Discrepancies, template leftovers, missed critical-result communication, and acquisition errors slip through because nobody has time to check every study.
How it works
- 1
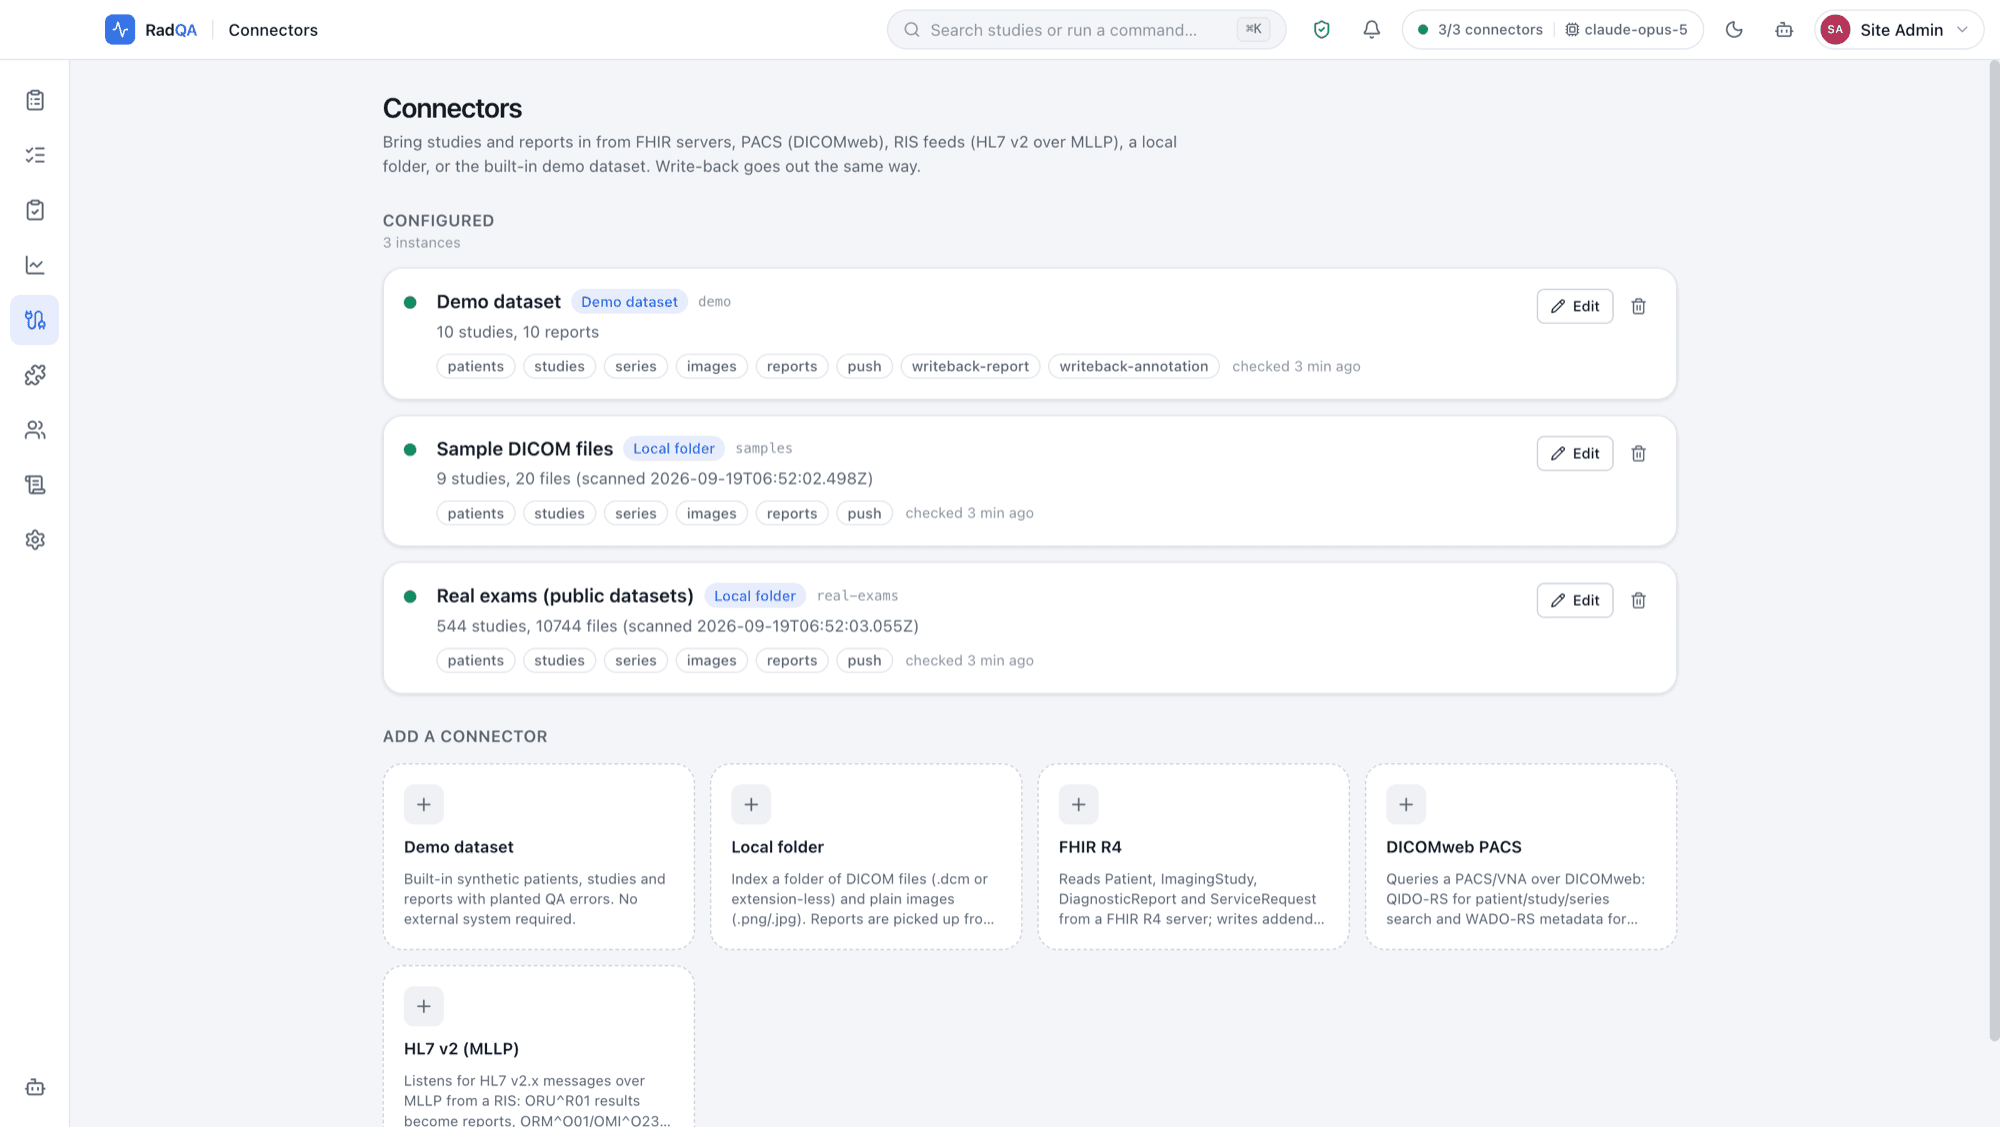
Connect a source — DICOMweb PACS, HL7 v2 RIS feed, FHIR R4 server, or a local DICOM folder.
- 2
QA flavours run on each study: report QA, protocol QA, image QA, and peer review, combining deterministic rules with model-backed checks.
- 3
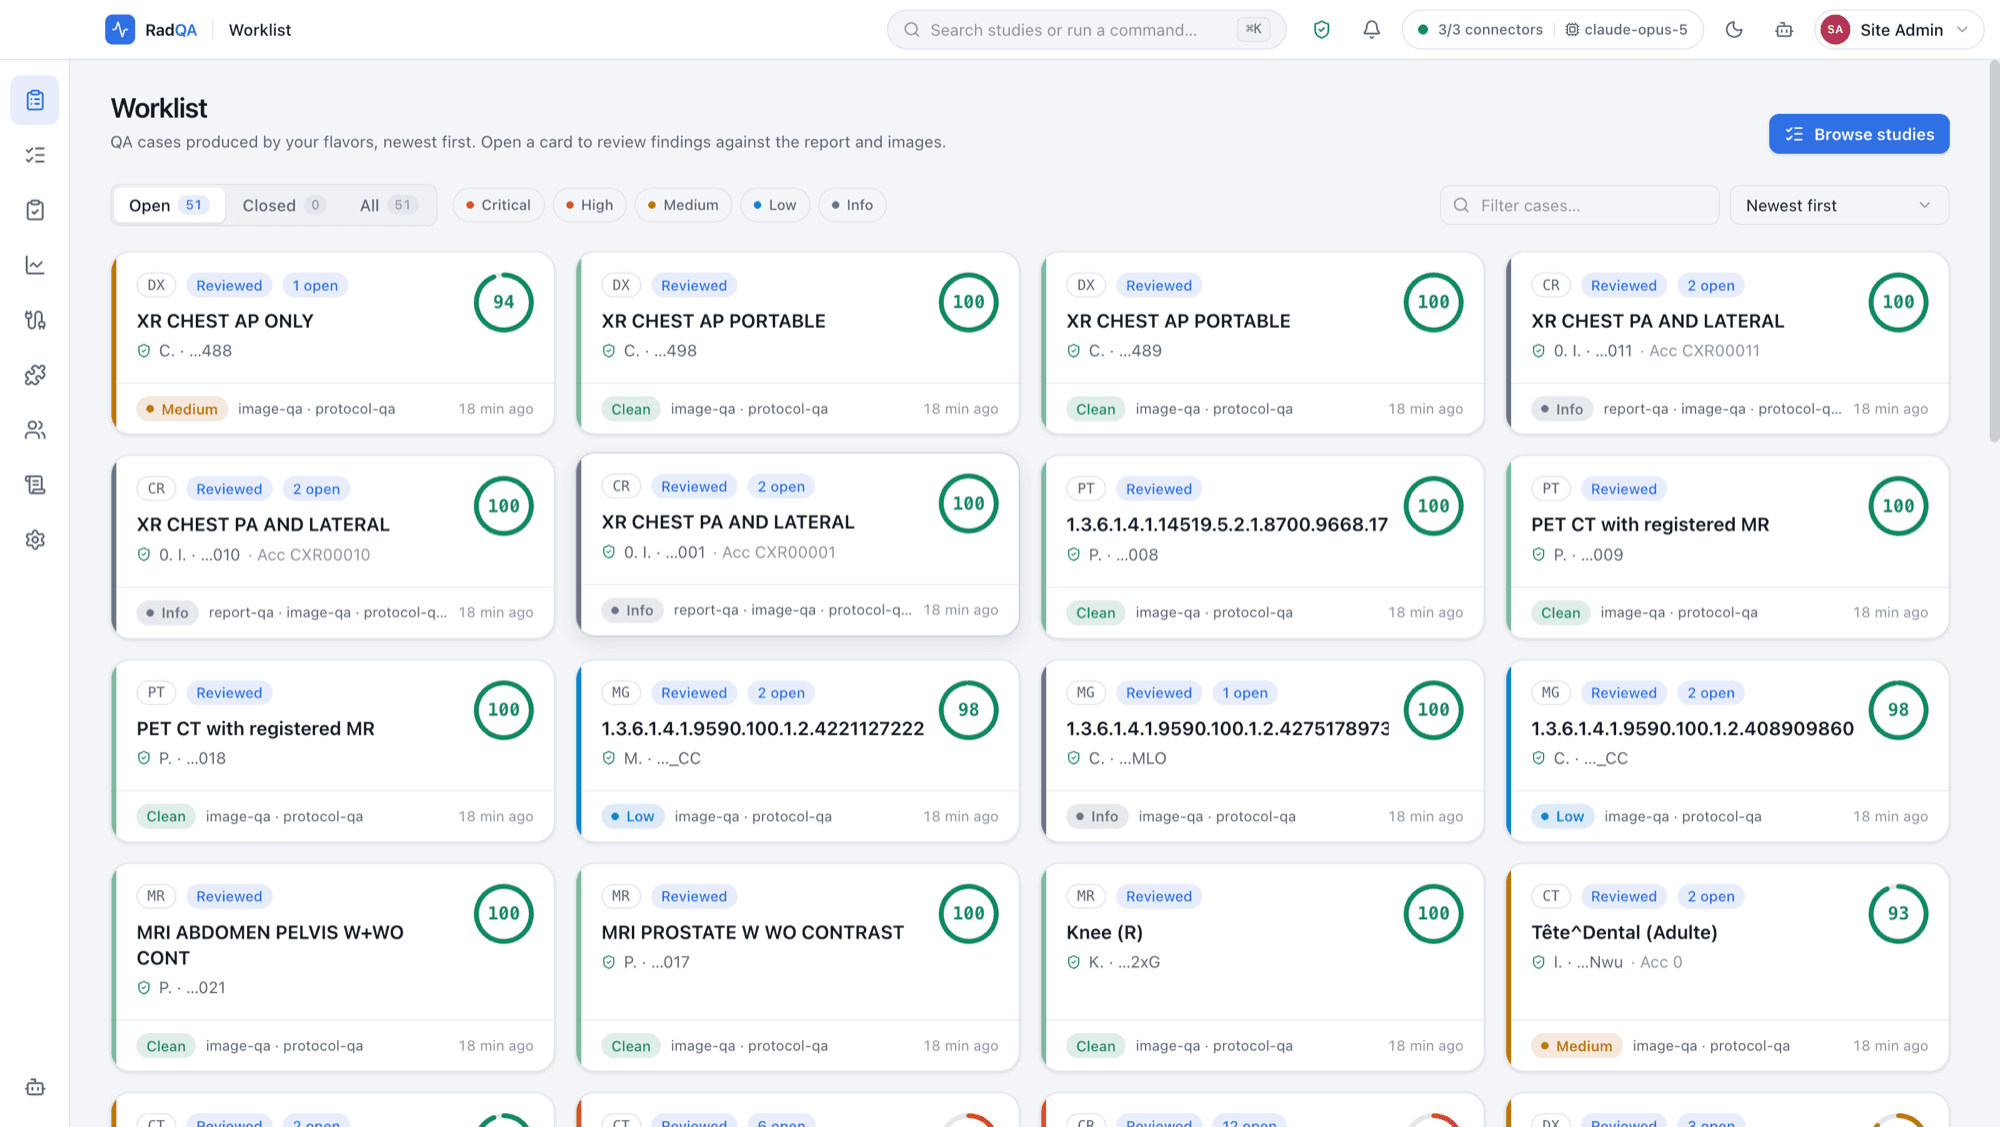
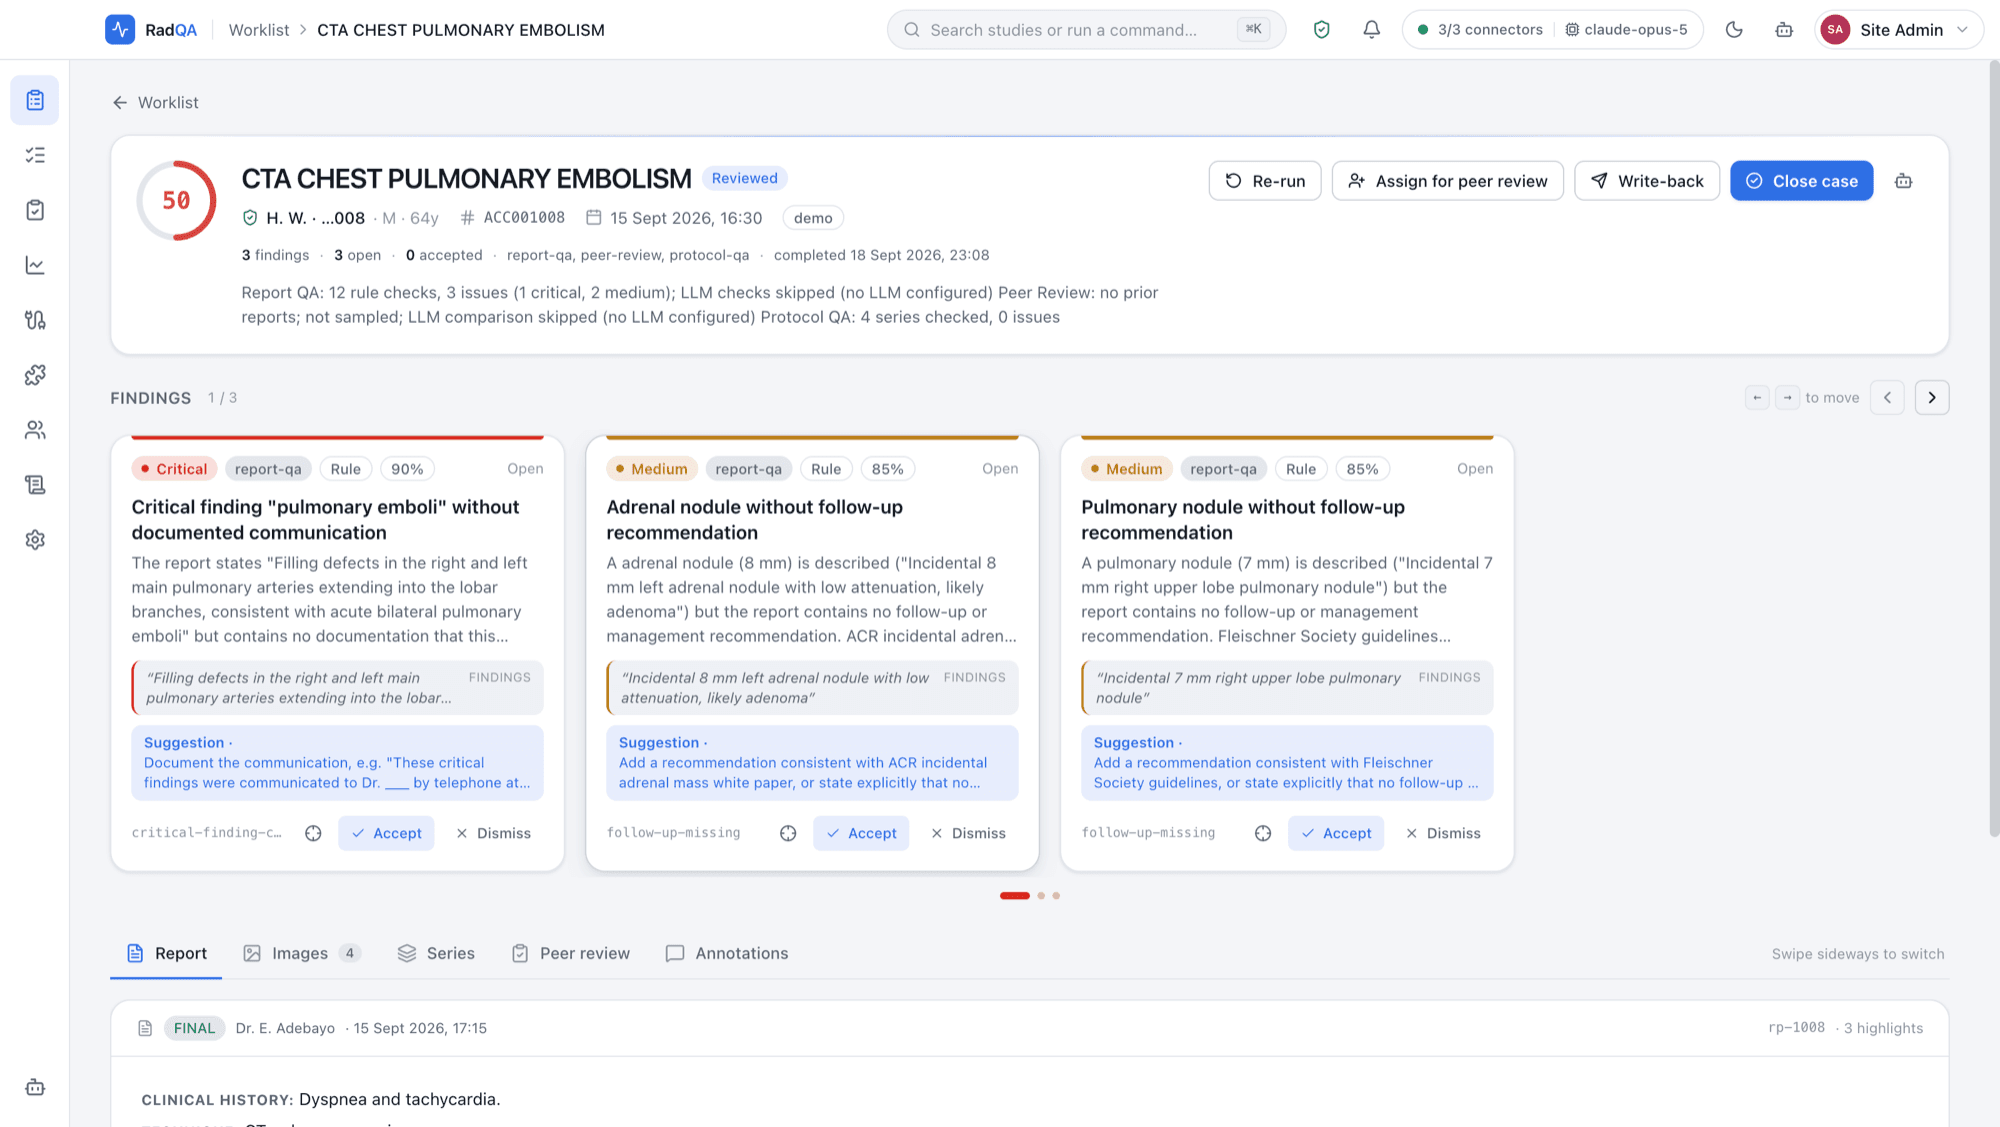
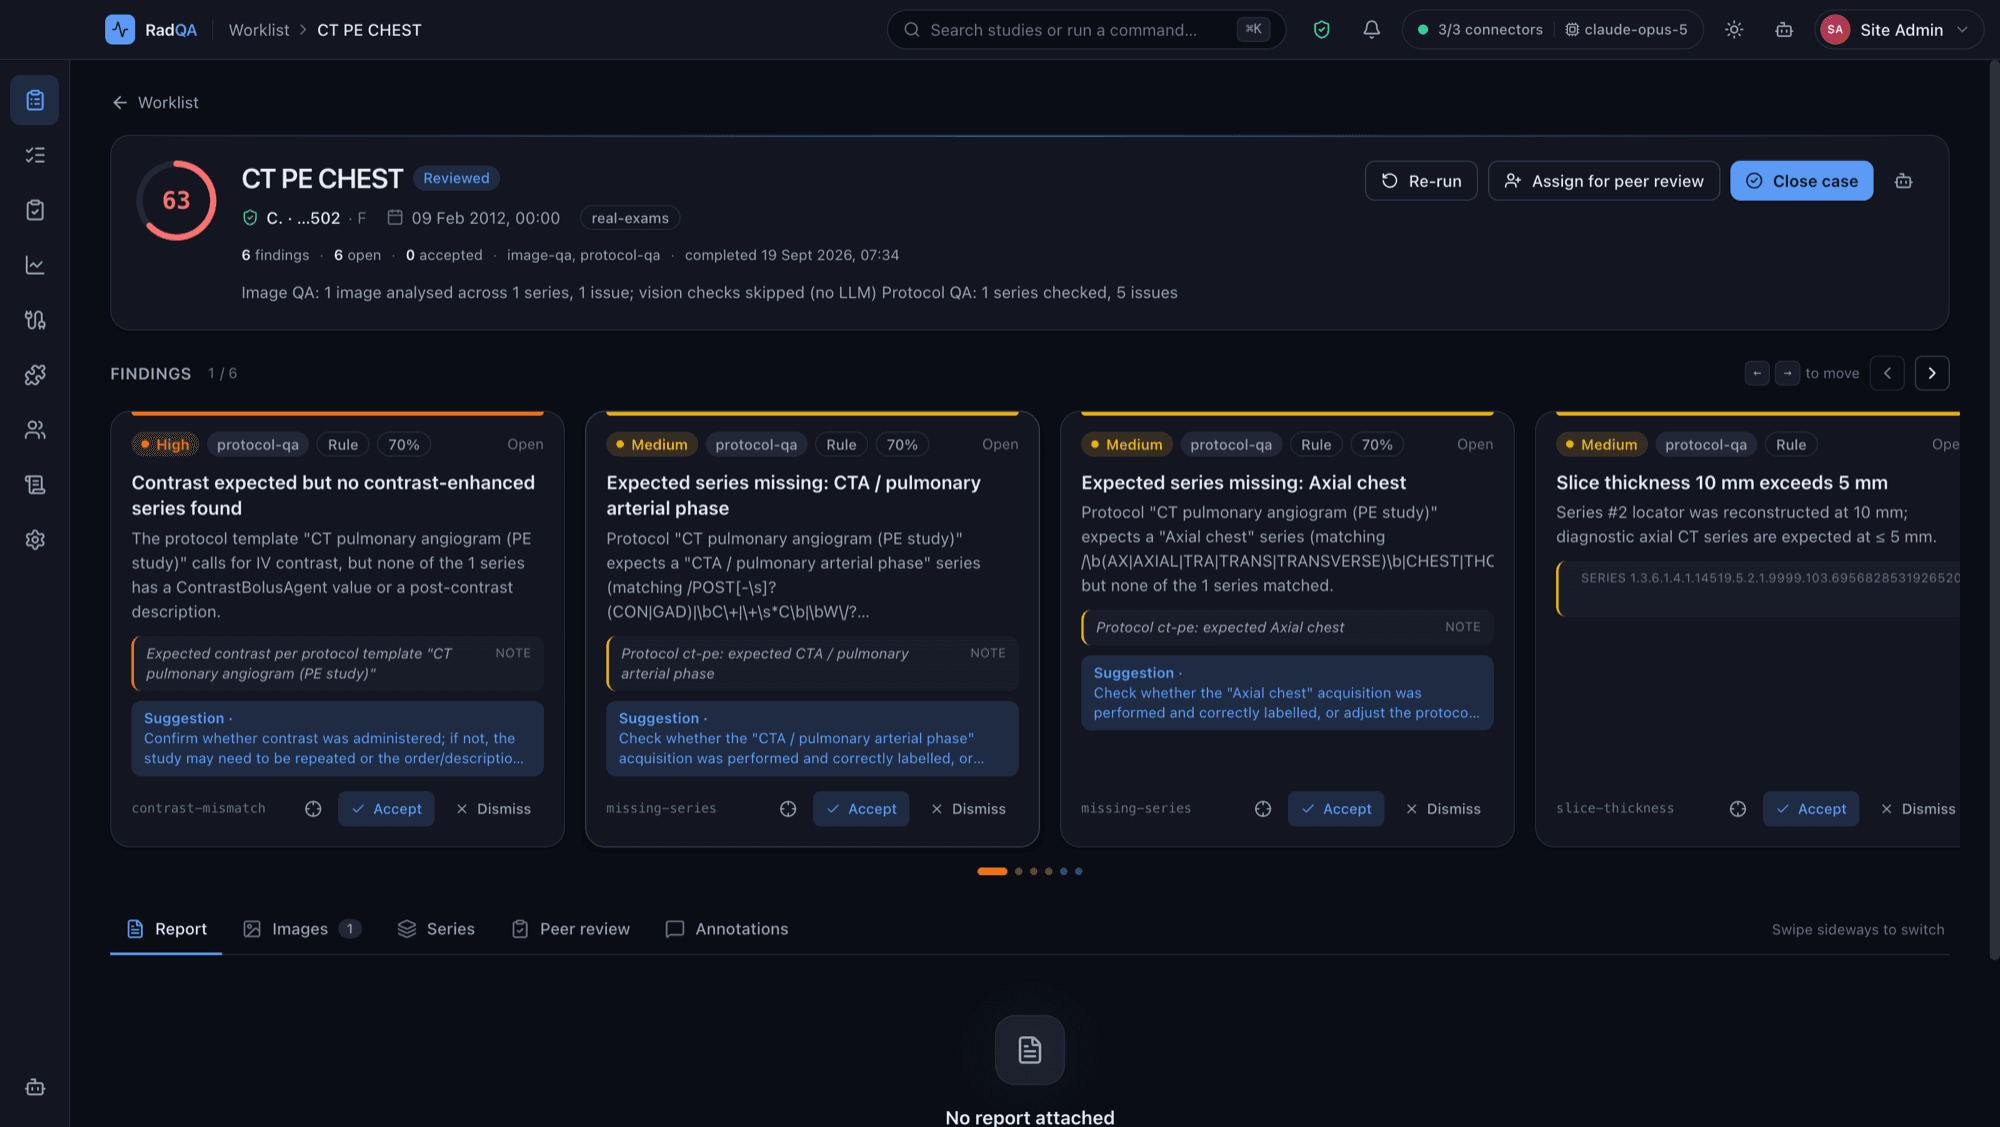
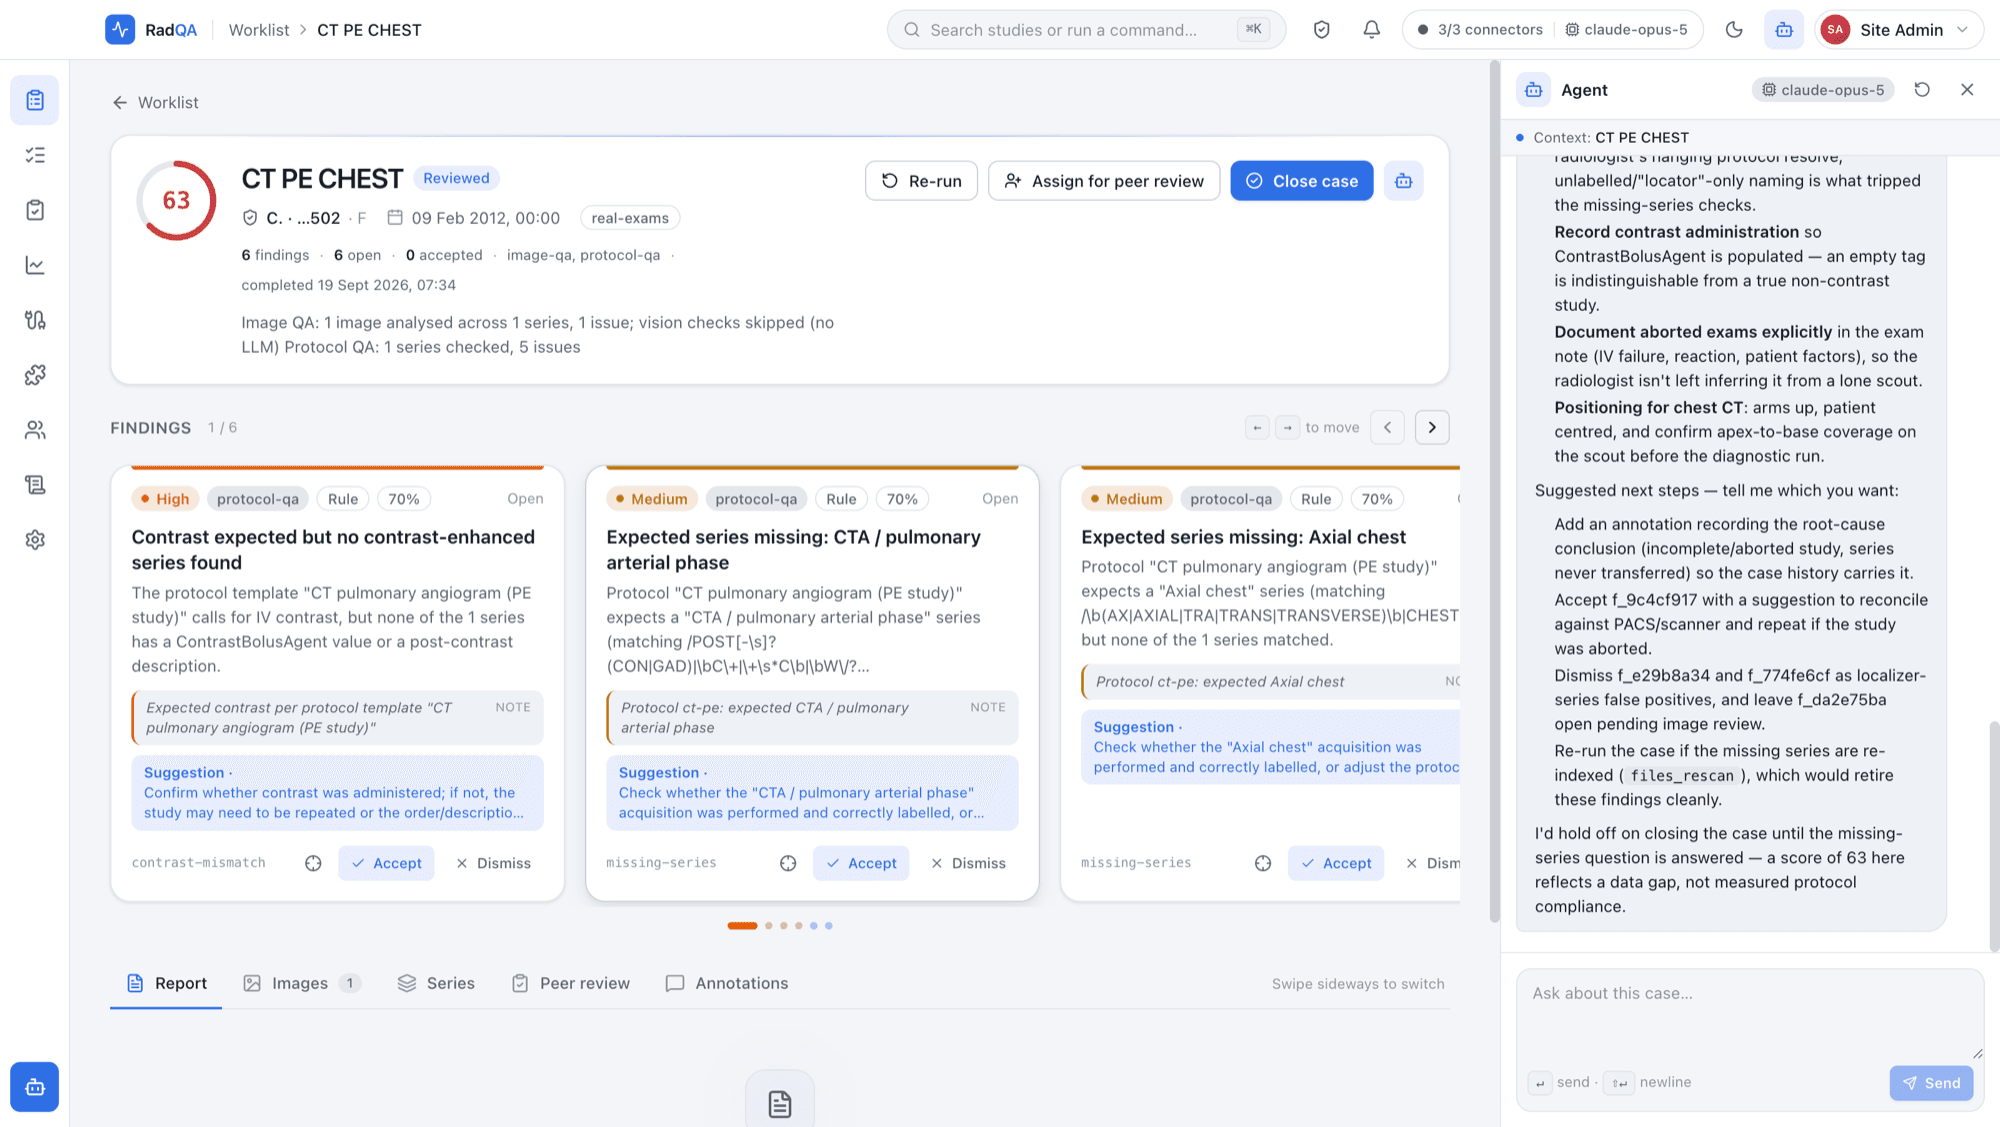
Findings land in a worklist with evidence highlighted; the agent helps investigate, and any write-back needs explicit approval.
Key features
- Report QA: laterality, impression vs findings, critical-result communication, follow-up, template leftovers
- Protocol QA: missing series, contrast and slice-thickness mismatches, body part and modality checks
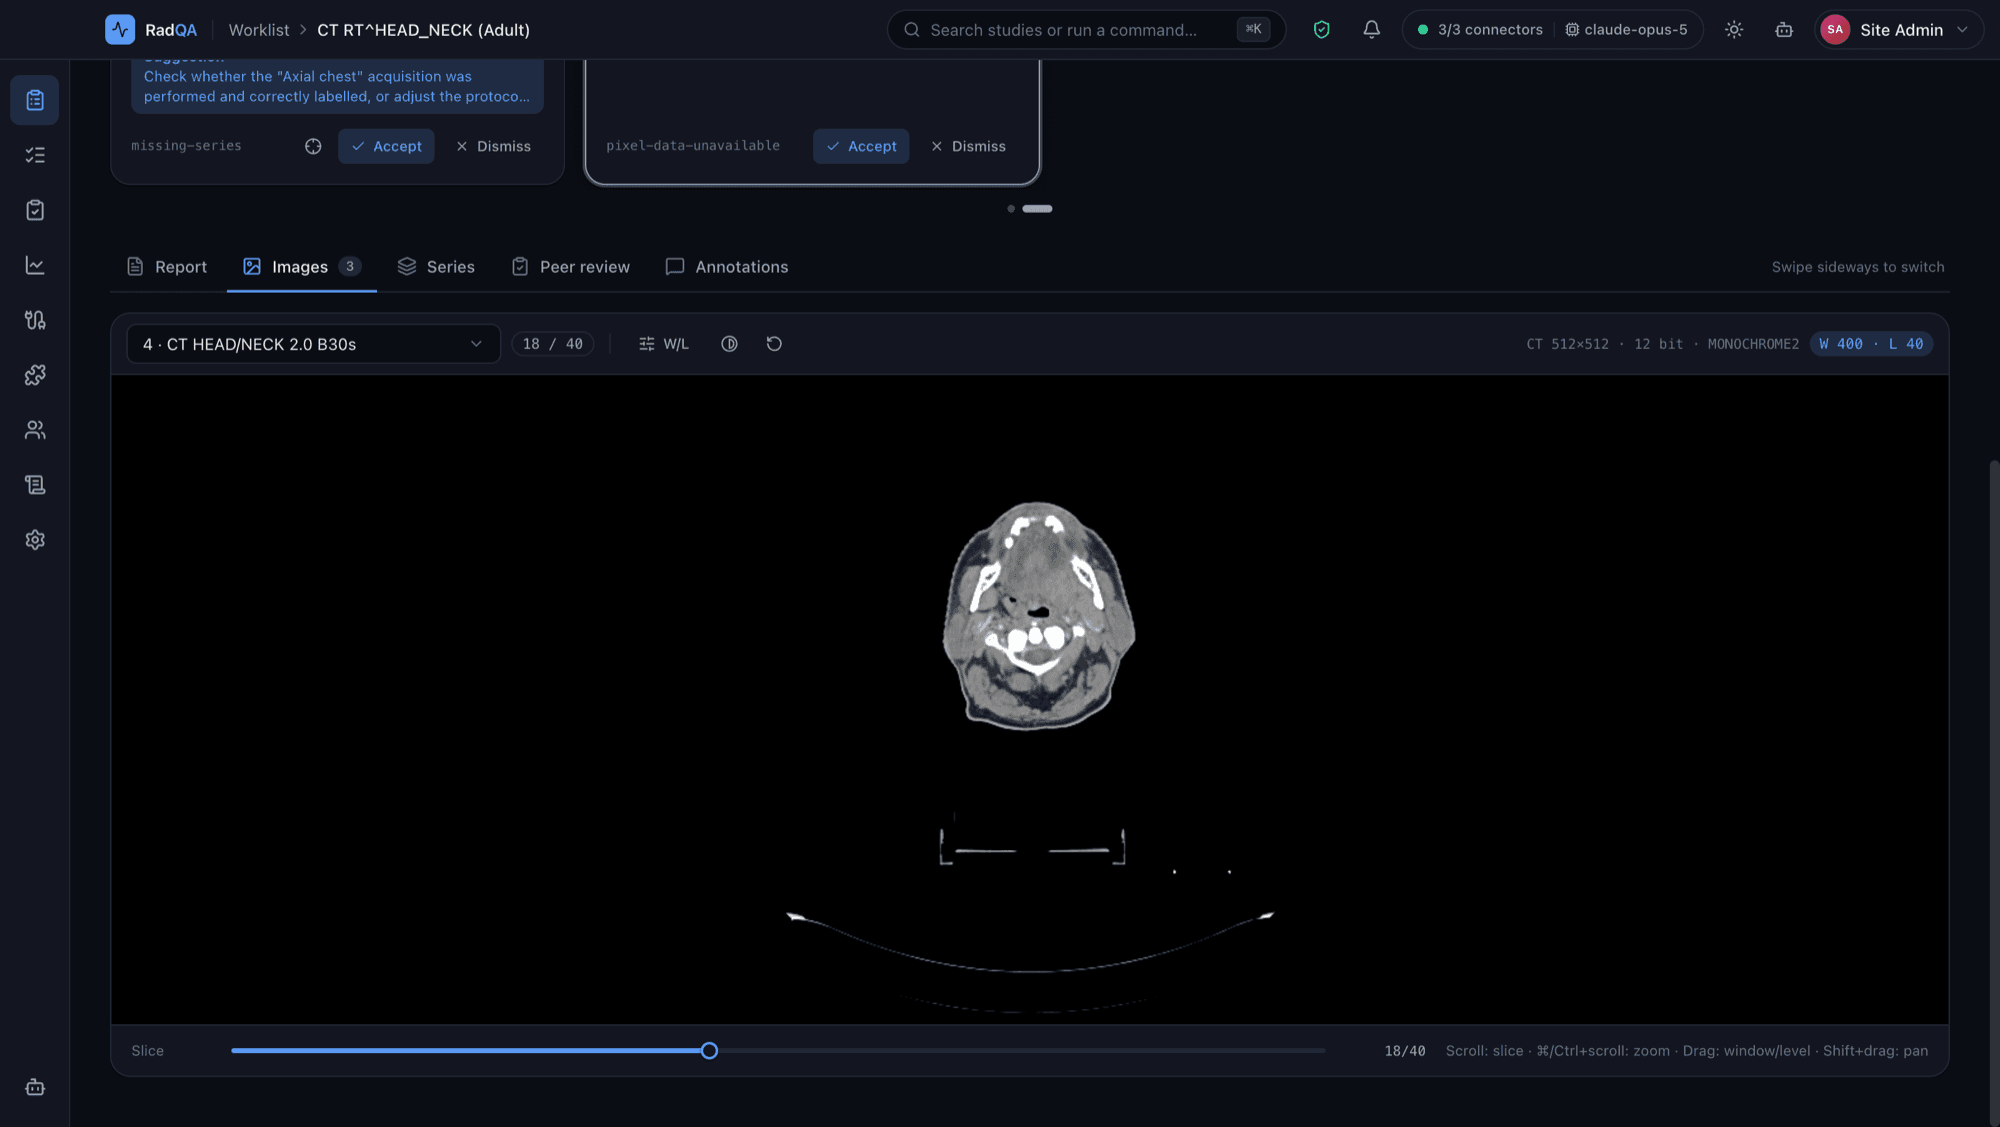
- Image QA: markers, exposure, collimation, clipped anatomy, rotation, burned-in identifiers
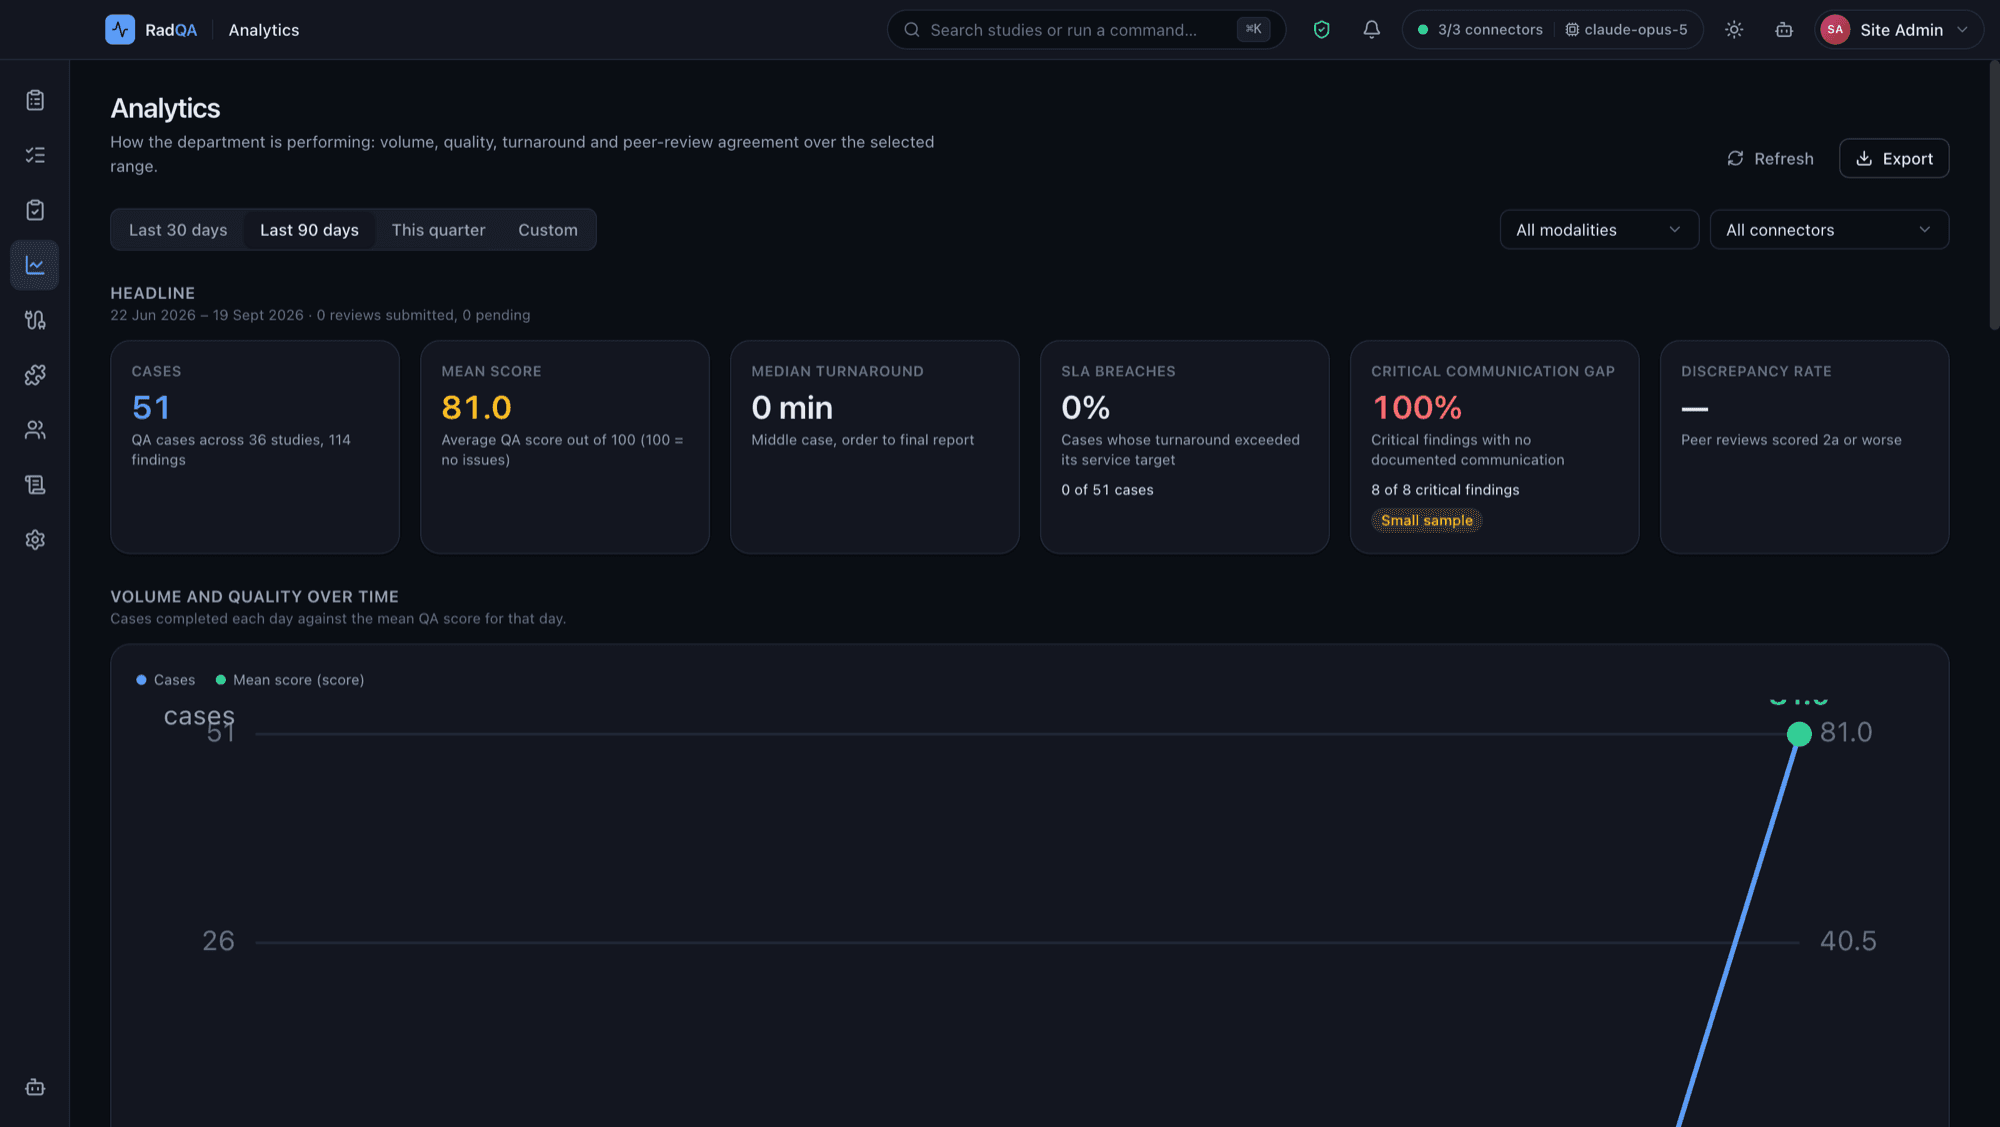
- RADPEER-style peer review with deterministic sampling
- Pluggable connectors: FHIR, DICOMweb, HL7 v2, local files, demo data
- Claude-powered agent with approval-gated external actions
- Runs on the desktop; API keys stay in the OS keychain
Inside RadQA
Screens from the current build. Details may change as the product develops.
Example journey
Step 1
Connect your systems
Point RadQA at PACS, RIS, or FHIR, or start with the built-in demo dataset.
Step 2
Run QA
Studies and reports are checked automatically as they arrive or on demand.
Step 3
Review the worklist
Open a case to see findings with evidence marked directly on the report and images.
Step 4
Act with oversight
Ask the agent to investigate; addenda and write-backs need explicit approval.
Get updates
Current status: Pilot